The AL60 features a powerful built-in web interface that allows you to configure almost every aspect of the clock.
To access the interface, simply type the clock's IP address into your web browser. You can find the clock's IP address using your router, using the Visit button on the Home Assistant Device info page, or using the Firmware Update Tool.
Time Settings
Section titled “Time Settings”
Time Zone
Section titled “Time Zone”Set your clock's time zone by either using the Auto-Detect Time Zone button or by entering a Time Zone manually. Custom Time Zone can be entered as a TZ String or a POSIX TZ String. Auto Detection is recommended followed by POSIX TZ. Some common time zone strings are:
| TZ String | POSIX TZ String |
|---|---|
| Australia/Adelaide | ACST-9:30ACDT,M10.1.0,M4.1.0/3 |
| Australia/Brisbane | AEST-10 |
| Australia/Darwin | ACST-9:30 |
| Australia/Perth | AWST-8 |
| Australia/Sydney | AEST-10AEDT,M10.1.0,M4.1.0/3 |
Setting the Time
Section titled “Setting the Time”When Enable SNTP Sync is enabled the clock will automatically synchronise the time over the internet using the configured time zone. The clock will periodically check with the time server to keep the time accurate and save this to the real-time clock (RTC) as backup. To manually set the time enter the desired time and date in the Custom Time box, clicking anywhere on the page to immediately update the time. Alternatively you can use the buttons to set the time. Both options will disable auto time sync.
Clock Settings
Section titled “Clock Settings”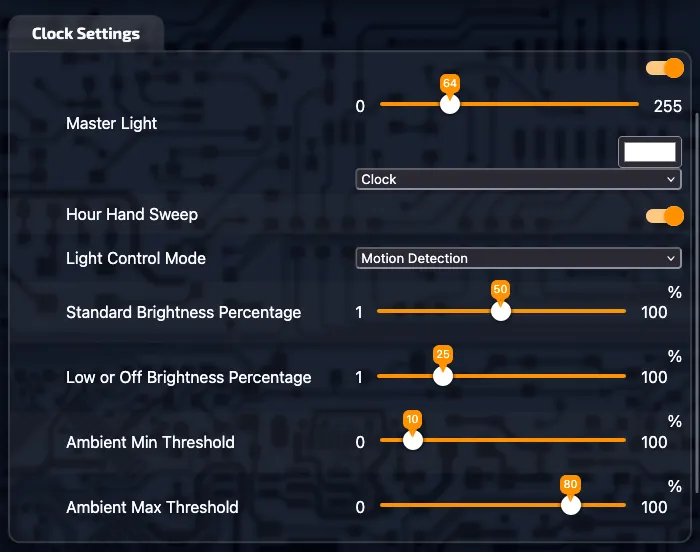
Master Light
Section titled “Master Light”The Master Light controls the behaviour of the two LED rings. Use the dropdown to select the desired clock display mode. When Light Control Mode is set to Manual/Off, the brightness slider can be used to select the brightness level of the clock display.
Hour Hand Sweep
Section titled “Hour Hand Sweep”The Hour Hand Sweep option adjusts how the hour hand is displayed. When enabled (default) the hour hand sweeps around the inner ring as the minutes pass, imitating a traditional analog clock. When disabled the hour hand is static at the current hour marker.
Light Control Mode
Section titled “Light Control Mode”The brightness of the clock display can be automatically adjusted based on the detection of presence or ambient brightness levels . Alternatively, Manual/Off mode can be used to keep the display at a constant brightness or when brightness control is managed by Home Assistant. The available Light Control Modes are:
- Motion Detection: Uses the built-in radar to adjust the display brightness when presence is detected.
- Ambient Brightness: Adjusts display brightness automatically based on room lighting.
- Motion Ambient Brightness: Combines the above two modes. When presence is detected the display brightness will be adjusted based on ambient light and dimmed when no presence is detected.
- Manual/Off: Keeps the clock at a constant brightness and turns off automatic scaling.
Brightness Settings
Section titled “Brightness Settings”Standard Brightness Percentage is the default brightness value used when motion is detected or when ambient brightness is above the Ambient Max Threshold.
Low or Off Brightness Percentage is the brightness value used when no motion is detected or when the ambient brightness is lower than the Ambient Min Threshold.
Ambient Thresholds
Section titled “Ambient Thresholds”To effectively use the Ambient Light modes, set the Ambient Min Threshold and Ambient Max Threshold to correspond to the measured light levels in your room. We recommend setting the Min threshold slightly higher than the value the brightness sensor reads at night and the Max threshold slightly lower than the value the brightness sensor reads during the day.
Clock LED Customisation
Section titled “Clock LED Customisation”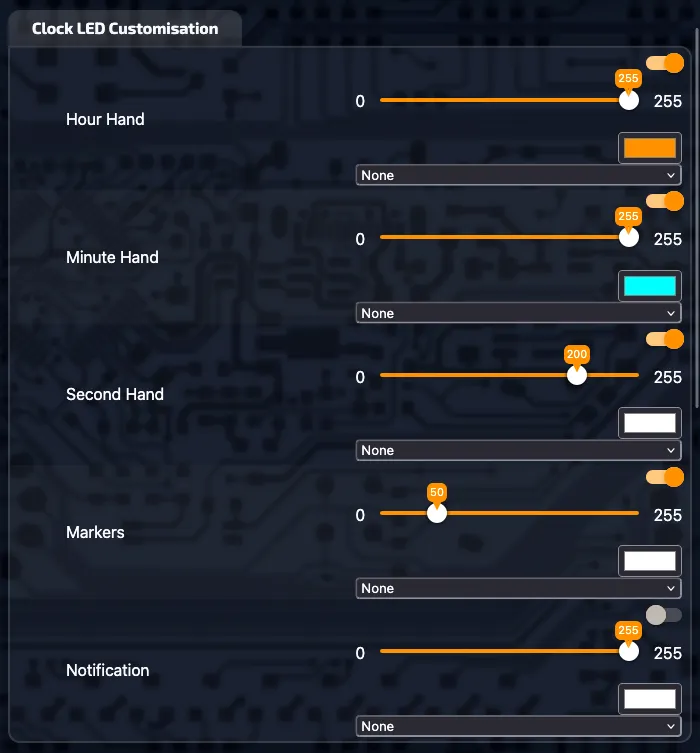
Customising Hand Colours
Section titled “Customising Hand Colours”Each hand (Hour, Minute and Second) can be individually customised:
- The toggle can be used to turn off individual hands.
- The brightness slider can be used to set the brightness relative to the other elements.
- Colour can be adjusted by clicking on the colour swatch.
- Using the dropdown menu, colour effects including Rainbow, Temperature colour and Humidity colour can be applied instead of a solid colour.
Customising Markers
Section titled “Customising Markers”The hour markers can be adjusted in the same way as the hands with the additional options to highlight the 12 o'clock position or the 12, 3, 6 and 9 o'clock positions.
Notification Arcs
Section titled “Notification Arcs”The notification arcs of the inner ring can be adjusted in the same way as the hands and with the additional sensor effect options outlined on the understanding the display page.
Sensors
Section titled “Sensors”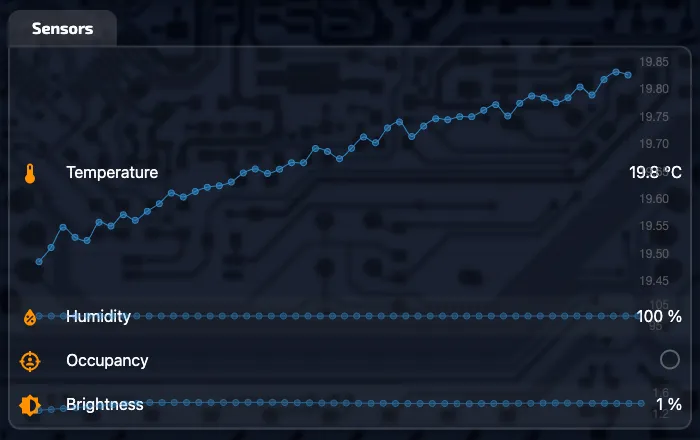
The values of the integrated sensors are shown in the Sensors tab. Clicking on a particular row will expand the chart showing more detail.
When advanced options are shown, you can also find options to calibrate the temperature and humidity sensors and adjust the occupancy sensor cool-off time.
Timer, Stopwatch & Alarm
Section titled “Timer, Stopwatch & Alarm”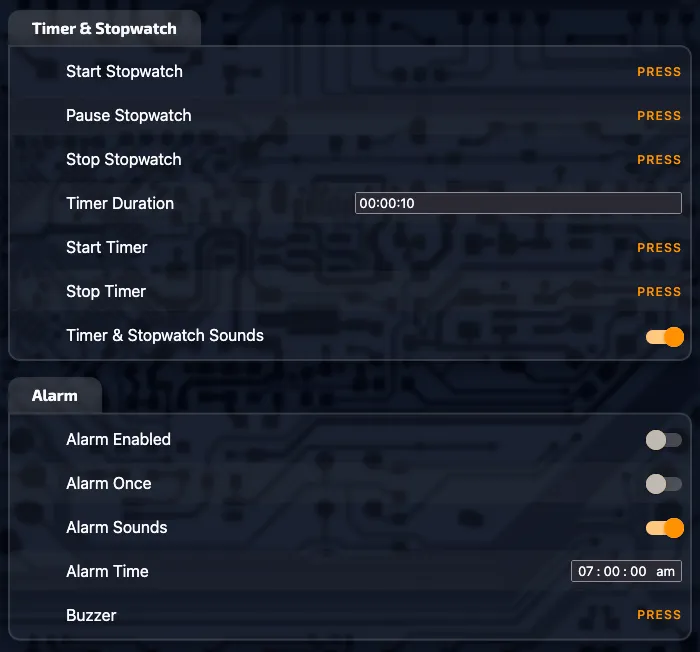
Timer & Stopwatch
Section titled “Timer & Stopwatch”The AL60 can be used as a timer or stopwatch. Use the buttons to start, stop and reset the timer/stopwatch. The length of the timer can be set in HOUR:MINUTE:SECOND format. Sounds will be played at key events unless the Timer & Stopwatch Sounds toggle is turned off.
The AL60 can be configured to alert you at a specific time of day visually and with optional sounds. The Alarm time can be set in HOUR:MINUTE format and will operate only when the Enable Alarm toggle is turned on. If the Alarm Once option is enabled the alarm will trigger once then be disabled.
The Buzzer button will play a short sound when pressed and can be used by automations in Home Assistant.
System, OTA Update & Diagnostics
Section titled “System, OTA Update & Diagnostics”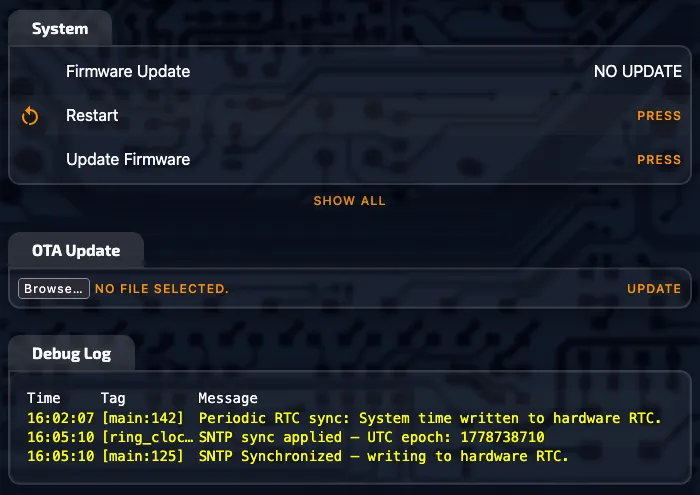
Debug Log
Section titled “Debug Log”System events such as time syncs are logged here. Warnings about settings changes are also displayed here.
Firmware Update
Section titled “Firmware Update”Any available firmware updates will be shown in the System tab. Use the Update Firmware button to check for and install any available firmware updates.
While not recommended, updates in OTA format can be downloaded from the NIX labs GitHub releases page and uploaded and installed using the OTA update option.
Advanced Options
Section titled “Advanced Options”In the System tab click the SHOW ALL button to unhide advanced options. These advanced options include:
- Reset with default settings: Erases all settings including Wi-Fi credentials.
- Temperature Offset (Sensors tab): Adjusts the displayed temperature up or down (in 0.1°C increments).
- Humidity Offset (Sensors tab): Adjusts the displayed relative humidity up or down (adjustment is not recommended).
- Occupancy Cool-off (Sensors tab): Set the time (in seconds) to wait after no occupancy is detected before dimming the display.